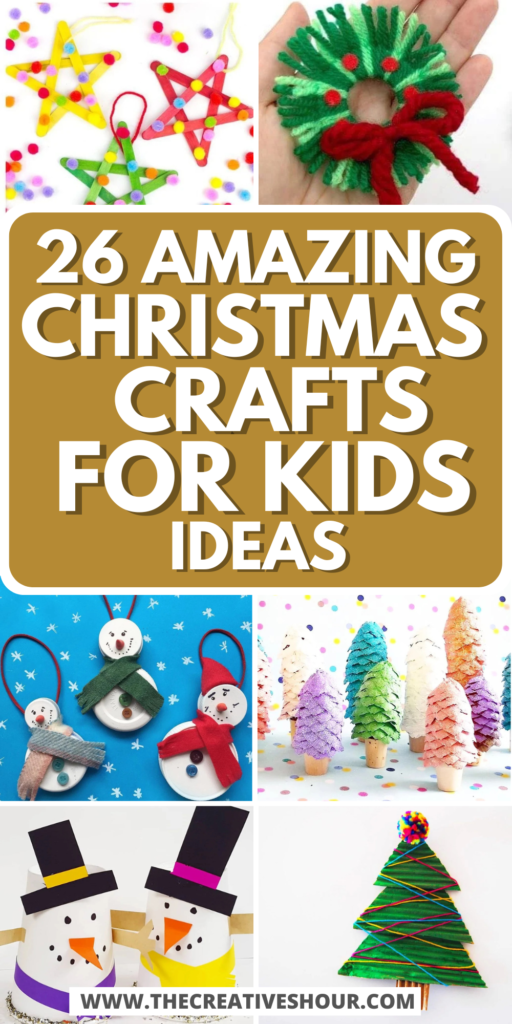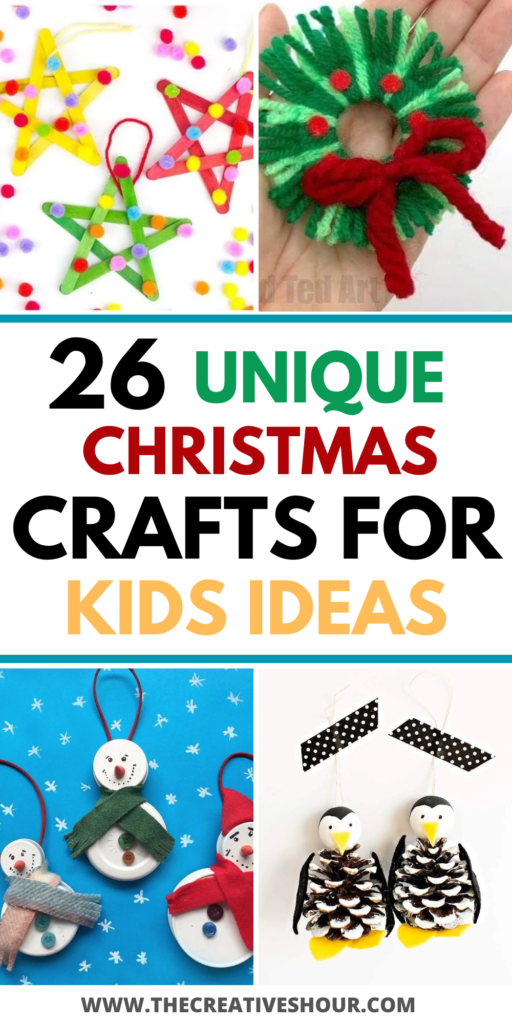
The Christmas season is finally around the corner! And you know what that means- spending time with your family, especially kids, and making memories. What better way to do this than to create some fun DIY Christmas crafts for kids? This will not only keep them busy indoors but will also keep their creative juices flowing.
Not only that, these DIY Christmas crafts are meaningful and personal that you can use to decorate your house during Christmas. Our roundup of 26 easy, fun and creative Christmas crafts for kids will ensure that you get to spend some quality time with your kids.
So grab some glue sticks, paper, and colors, and let’s get creative 🙂
1. Colorful Pom Pom Popsicle Stick Stars
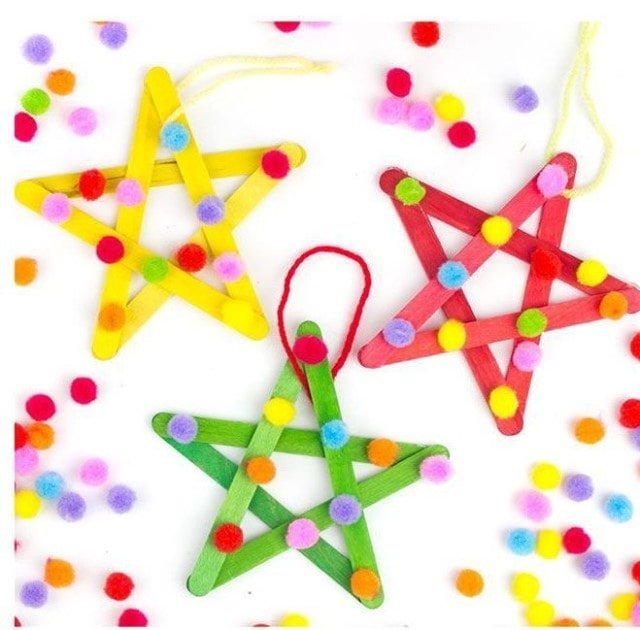
I love using pom poms in Christmas crafts for kids. They’re just so bright and can add color to any craft that you create. These cute and colorful pom pom popsicle stick stars by kidscraftroom are just so adorable and easy to make. They’ll look amazing hanging on your Christmas trees, and also adds a personal touch to your Christmas ornaments. To make these, you’ll need some colored popsicle sticks, pom poms, glue, and some yarn. Glue the popsicle sticks together to create a star. Then, tie the yarn and glue on the pom poms. For a more detailed explanation on how to make these, click here.
2. Bottle Lid Snowman Decorations
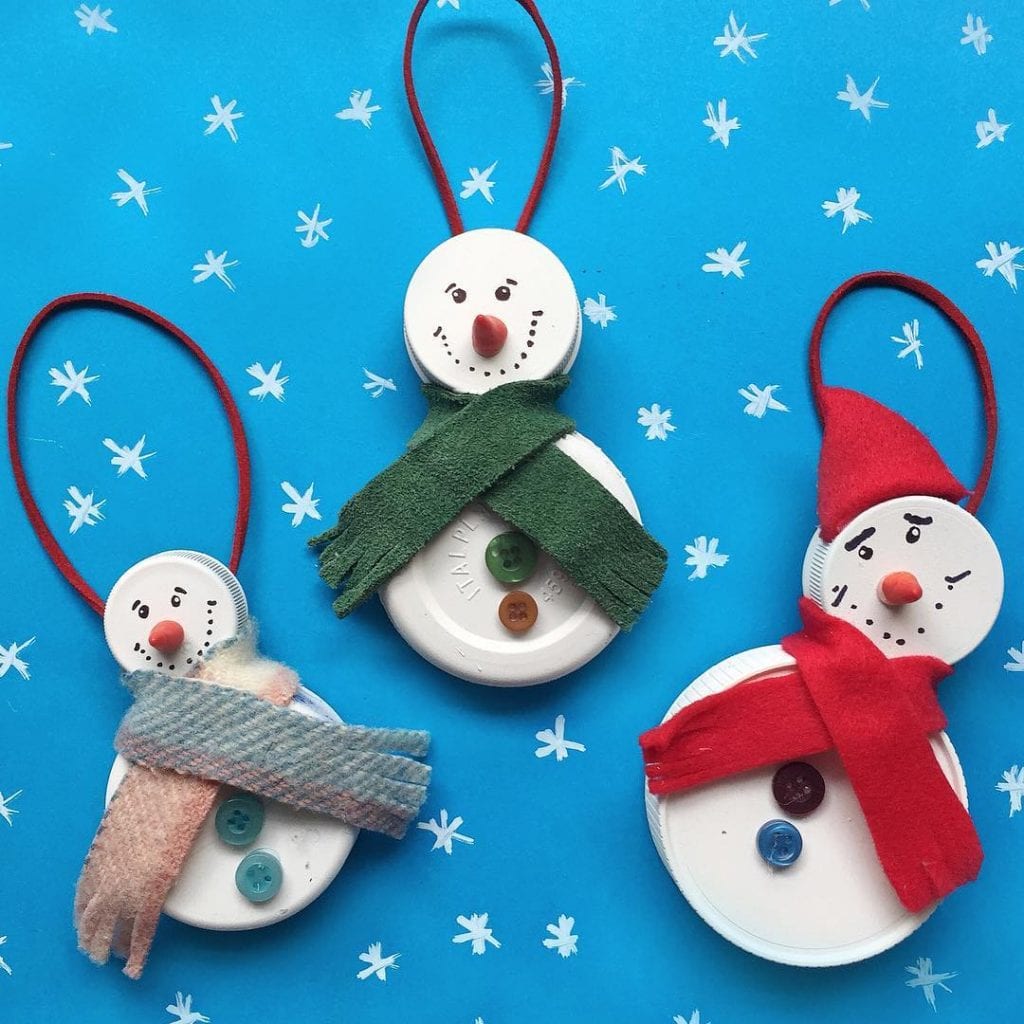
These adorable snowmen by handywithscissors are extremely easy to make. They require minimal materials and should be doable for a 6-year-old or younger with some supervision. All you need are one small and one large bottle lid, colored felt or blanket scrap, White acrylic paint or white spray paint, some orange oven-bake clay, sharpies, and some sort of cord or yarn.
Firstly, glue the small and big lid together and paint them white. Then, roll tiny carrot noses using the clay and use a marker to add details to the snowman. Then, attach a piece of cord to the backside of the bottle caps to create a fastening. Cut a thin length of a blanket or felt and wrap it around the next of your snowman. Stick down with hot glue. To finish stick on a few buttons. To check out the step-by-step tutorial, visit their blog.
3. Mini Woolen Wreathes
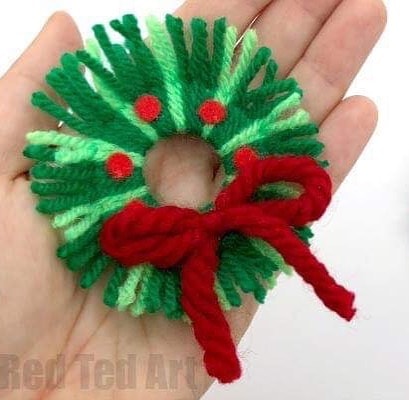
These mini woolen wreathes by redtedart are just so adorable. They serve as cute yarn Christmas tree ornament or can be added to gifts and greeting cards. These are great for your kids’ motor skills as well. To make these, you will need some yarn or wool in your desired colors, a little felt, cardboard, and a pair of scissors. For a detailed step by step tutorial, visit Easy Yarn Wreath Ornament.
4. Textured Cardboard Mini Christmas Trees
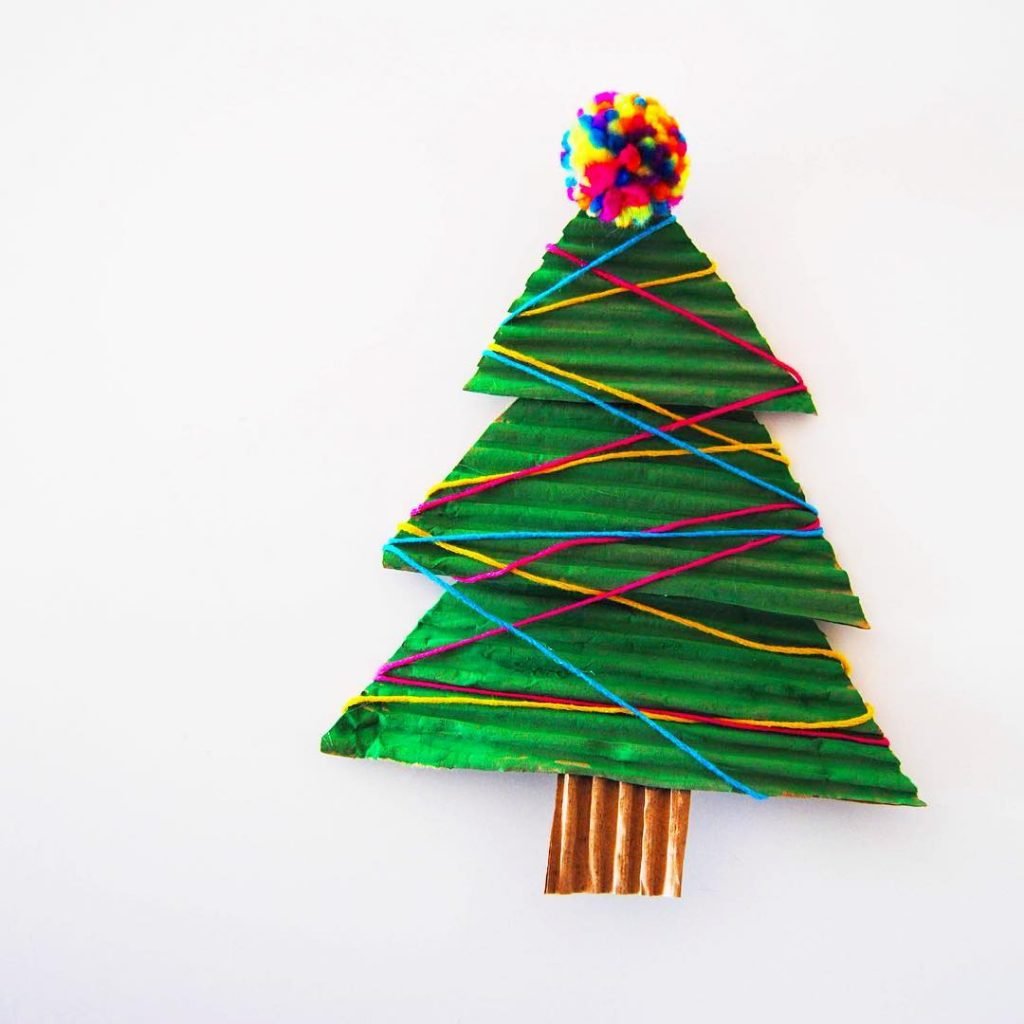
How cute are these mini Christmas trees by startcreativestudio? These textured cardboard mini Christmas trees are super simple and easy to make. All you need is some textured cardboard, pom poms, some colored yarn, green and brown paint, a pair of scissors, and some glue. Cut out three triangles from the cardboard and paint them green. Then, cut out another piece of cardboard for the tree trunk and paint it brown. Glue them all together so that it starts to look like a mini Christmas tree. Then, decorate it using the colored yarn and pompoms. You may also use glitter, sparkles, and stars. Get creative!
5. Cute Sewing Tree Ornaments
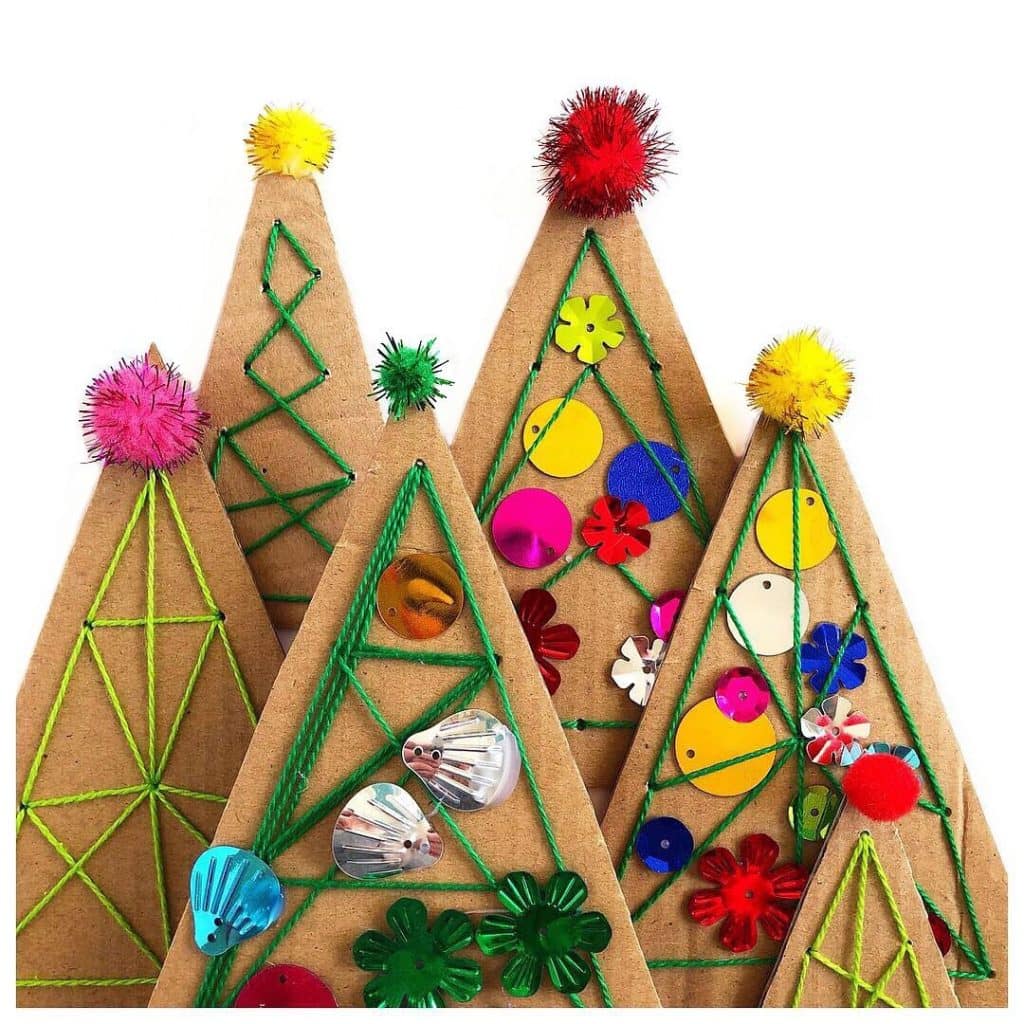
Here is yet another fun way to jazz up your Christmas tree by hello.moonpie. How about creating some mini Christmas trees to adorn your actual Christmas tree? These mini trees are easy to create, and your little ones can go crazy with the decorations. All you need is some cardboard, pompoms, a glue stick, a pair of scissors, a needle and yarn, and anything else you want to decorate your mini trees with. Cut triangles out of scrap cardboard and poke holes into them. Then, hand your little ones a nice big embroidery-threaded needle and let them go sew crazy! Add spangles, stars, glitter, and pom-poms too.
6. Shimmery Pine Cone Trees
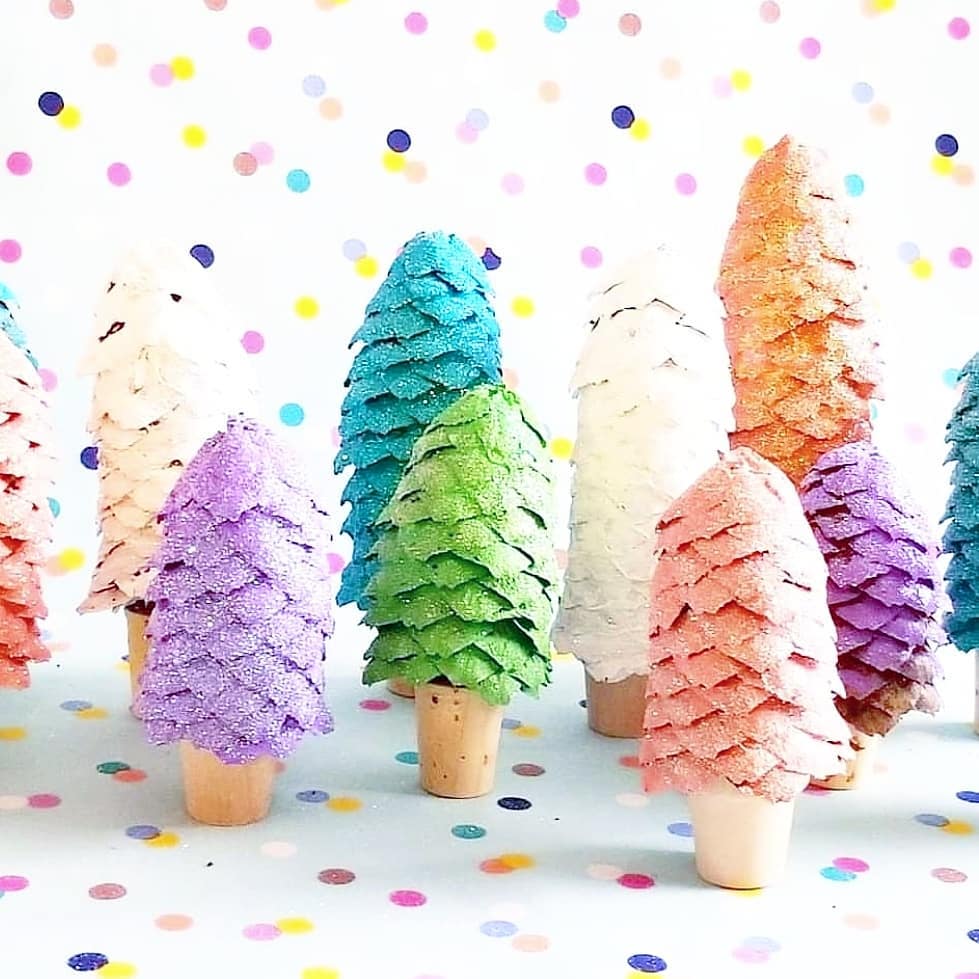
Here are some sparkly pine cone trees by brainly_beginnings_network. Create your own Magical Pine Cone Forest with these shimmery pine cone trees. It’s super easy and fun and make fun Christmas decor. To make these, you will need some pine cones, acrylic paint, brushes , mini wooden flower pots, extra fine white glitter, and a hot glue gun. First, pull the bottom end of the pine cone off to your desired tree length. Then, apply some hot glue to the end and place the flower pots at the bottom. Then, have fun with the paint and glitter. For a detailed tutorial, visit their blog.
7. Christmas Tree Leaf Decorations
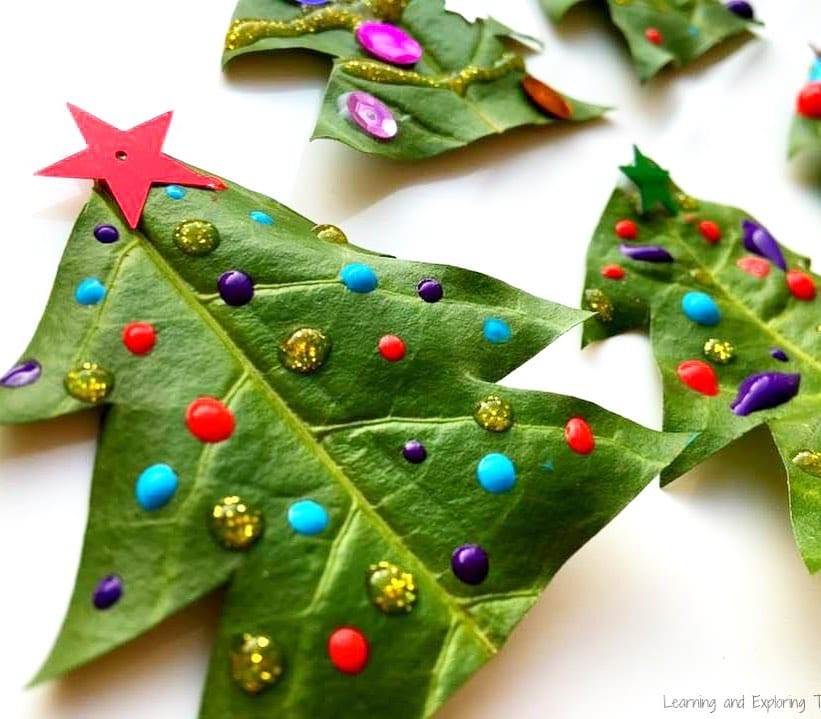
Can crafting get any simpler than this? Here is a Christmas tree leaf decor idea by learningthroughplay8. To make this super simple craft, pick up a large leaf from your backyard. Cut it in the shape of a Christmas tree using scissors and go crazy with decorating this mini Christmas tree. You can use glitter, stars, stickers, paint, anything you like.
8. Pinecone Penguins
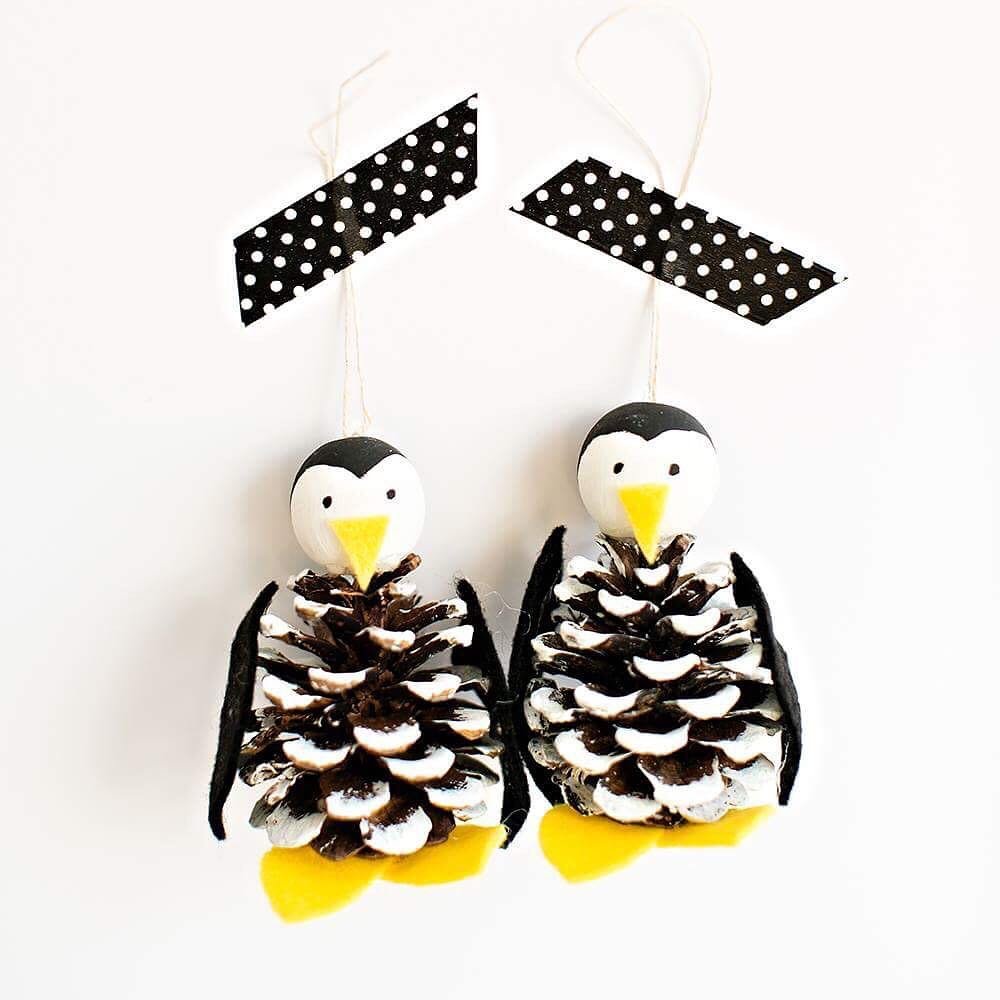
Who’s excited to make these adorable pine cone penguins by hellowonderful_co?You can make them using basic materials to add a fun element to your Christmas trees. To make these, you will need some pine cones, black and yellow felt, black and white craft paint, paint brush, a pencil, 1″ wooden beads, string or twine, and hot glue. First, paint the tips of the pine cone and the wooden beads white and allow them to dry. Then, draw the penguin’s head using a pencil and paint it black. Cut out pieces of black felt for the wings and yellow felt for the feet. Also cut a small triangle for the beak, hot glue that on the wooden bead. Thread a piece of twine through your bead and secure the end with a large knot. Hot glue your bead to the pine cone. You’re done! For a step by step guide, visit their website.
9. Cute and Easy Christmas Cards
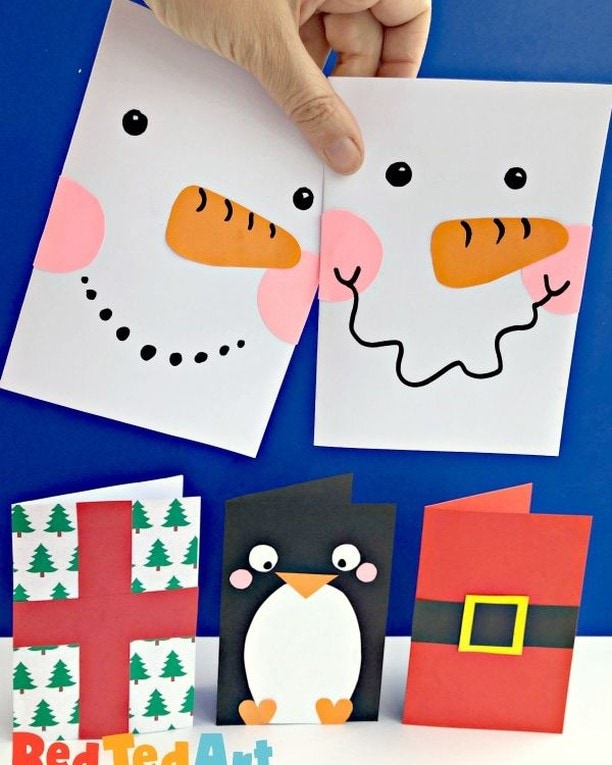
Christmas cards are always fun to make and are super simple as well. You can give your kids total freedom to unleash their creative side. All you’ll need are some craft papers, a pair of scissors, a glue stick, and anything else they want to add to their card. They can use googly eyes, stickers, glitter, beads, literally anything under the sun. Encourage them to write sweet messages inside and exchange cards with family and friends.
10. Paper Cups Snowman
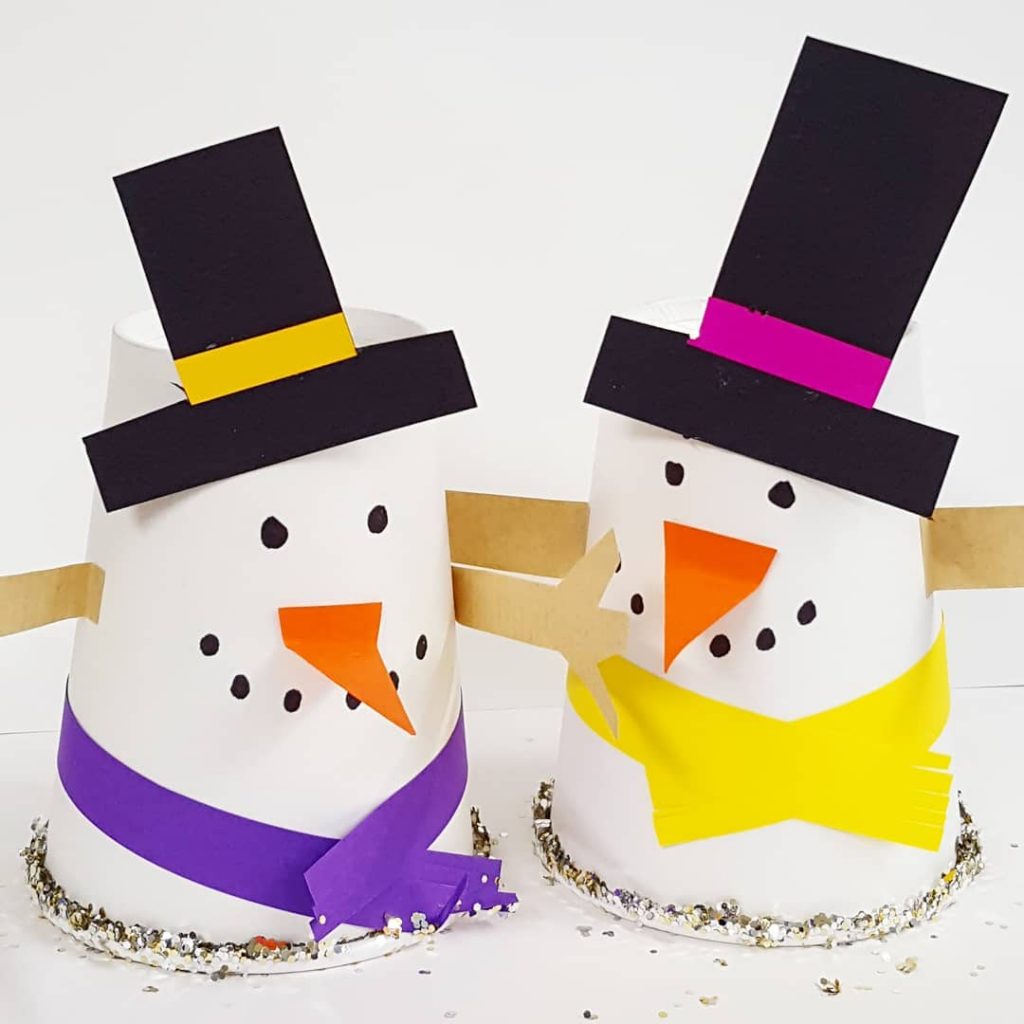
These paper cups snowman by heart_artlife are super simple and fun to create. All you need are some plain white paper cups, craft papers, a pair of scissors, a marker, and glue stick. Cut the craft paper to create a hat, the hands and a shroud for the snowman. Paste them on to the paper cups and use a marker to draw on the eyes and a big wide smile. Use glitter to add some shimmer as well.
11. Cupcake Liner Christmas Trees
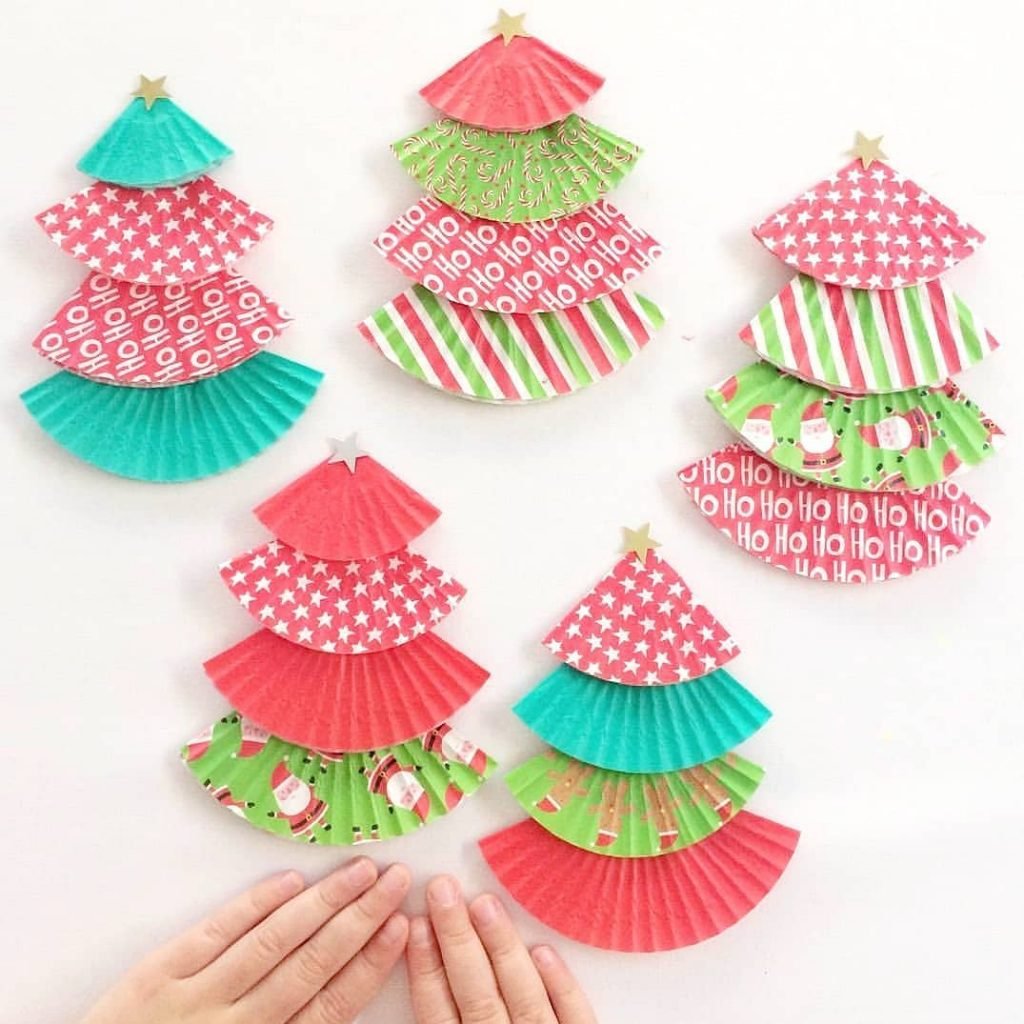
These folded cupcake liner trees by cintaandco are lots of fun to make. They look great as a decoration for your Christmas tree or paste them down onto some paper and make a lovely card for your friends and family. All you need are some colorful cupcake liners, some glue and anything else you would like to decorate your tree with. Simply fold the cupcake liners and attach them together to make the tree. Then, add stars, glitter, stickers, or anything the kids like to make it fun and creative.
12. DIY Animal Gift Wrapping
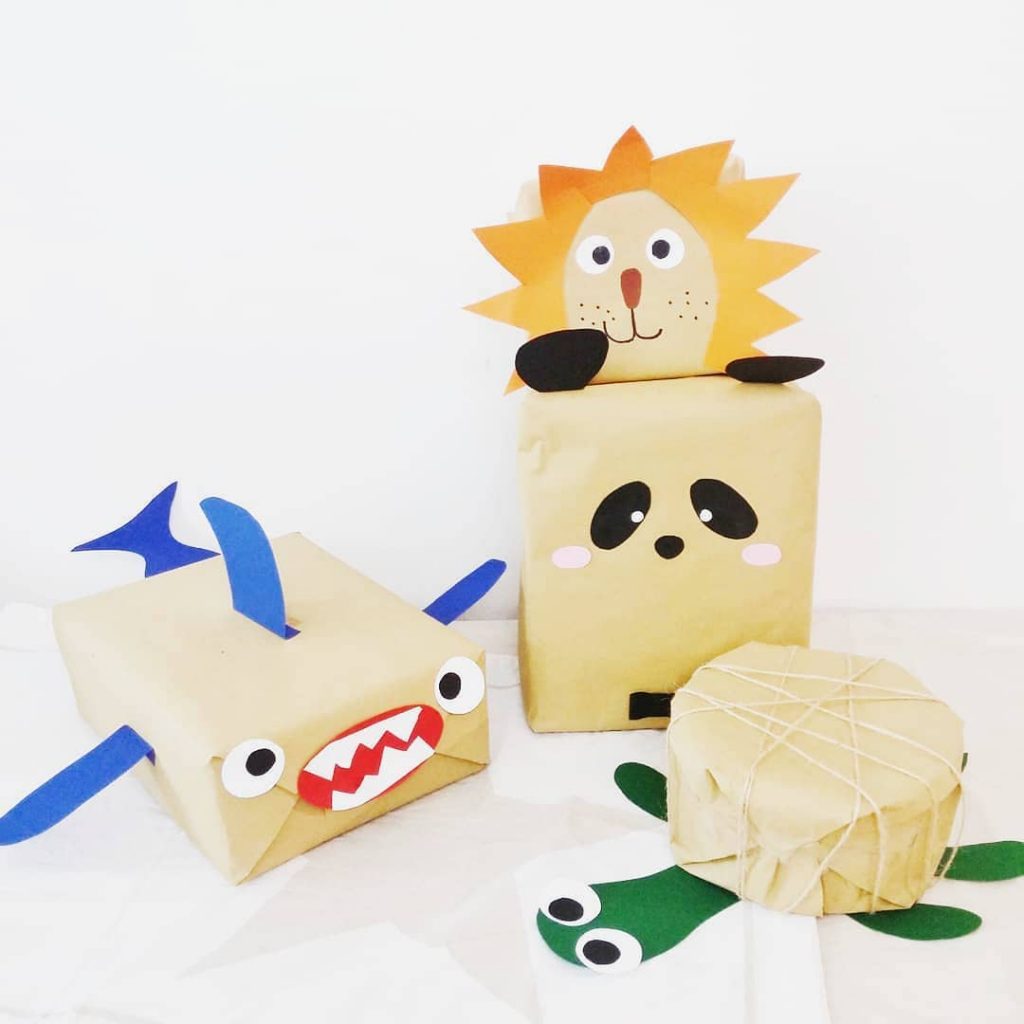
Tired of using the same old boring wrapping paper every year? Try these crafty animal gift wrapping by monstamoons. These are very easy to make and add a fun element to all your gifts. All you need is some craft papers, a pair of scissors, and some sharpies. Use this to wrap your kids’ presents or make this with them and they can use these to give christmas gifts to their friends and siblings.
13. Paperplates And Yarn Santa Craft
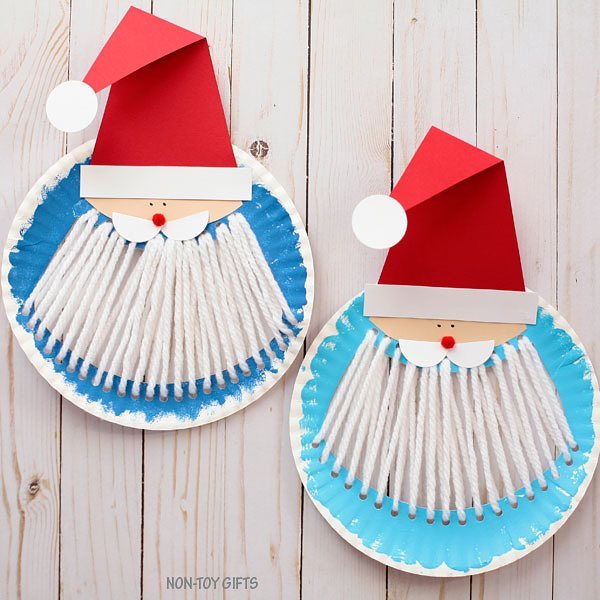
Paper plate Christmas crafts are so much fun to do with kids. Try adding yarn to it as well, and you can create this amazing paper plates Santa clause by nontoygifts. This adorable paper plate Santa will look great hung as a decoration by the fireplace or in the kids’ bedroom. To make this, you will need a paper plate, some paint, yarn and needle, a pair of scissors, a hole punch, paint sponge or paint brushes, some markers, and red pom poms. For a step by step guide on how to make them, visit their blog.
14. Reindeer Newspaper Craft
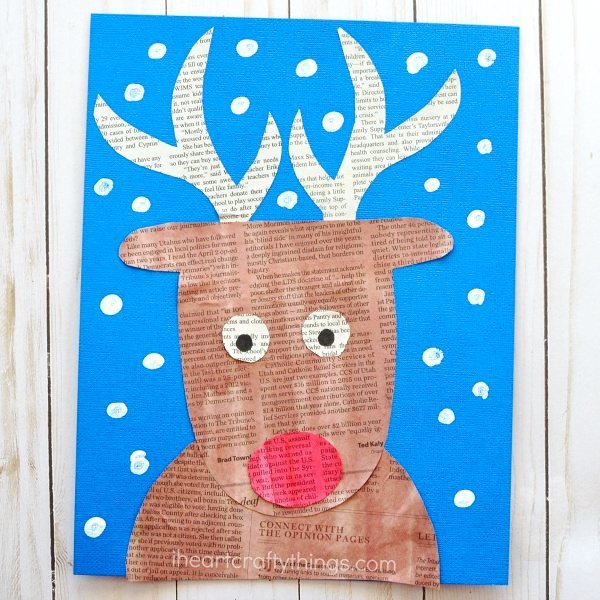
This cute reindeer by iheartcraftythings makes a fabulous Christmas craft for kids. You can use recycled newspapers or you can swap out the newspaper for colored cardstock. Either way, this cute newspaper reindeer craft is sure to fill your afternoon with loads of fun! To make this, you will need some old newspapers, glue stick, scissors, blue cardstock, paint, and some markers. Head over to their blog to download the reindeer template and for a step by step tutorial on how you can make one of these.
15. Colorful Christmas Tree Paperplates
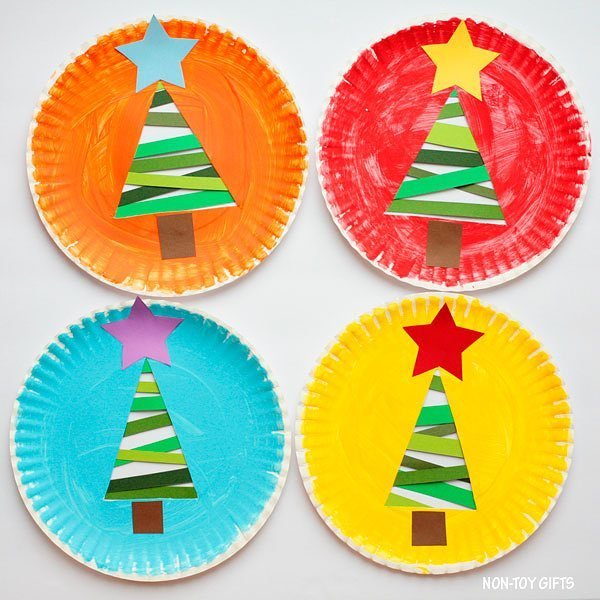
Here is another fun paper plates Christmas crafts for kids by nontoygifts. To make this, you will need some paper plates, colors and paint, paint brushes, pencils, a pair of scissors, some green construction paper, card stock paper, and some glue.
Start by painting the plates with any color of your choice. Then, cut out a triangle on the plate. This will be the body of the Christmas tree. Flip the plate upside down and cut and paste strips of green construction paper at the back of the plate. Then, cut out a star and the trunk of the tree and paste it on the plate. For a detailed tutorial and pictures of each step, visit their website.
16. Paper Ball Reindeer Craft
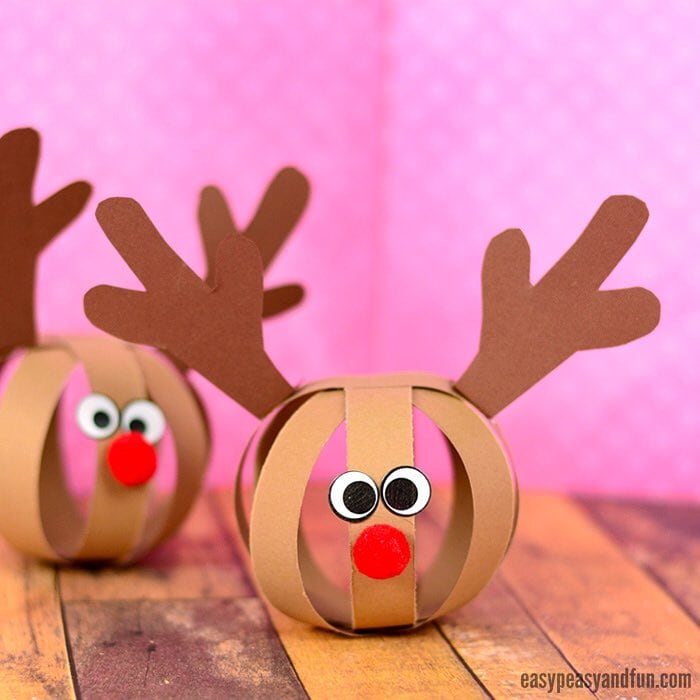
How adorable are these Paper Ball Reindeer Christmas crafts for kids by easypeasyandfun? What’s wonderful about these lovely paper balls is that you can turn them into the most adorable Christmas garland ever! Making them is super easy too. All you need are some light and dark brown construction papers, a pair of scissors, some glue, googly eye stickers, and red pom poms. For measurements and step by step tutorial, click here. You can make a few of them and then string them together for a cute Christmas garland or wall hanging.
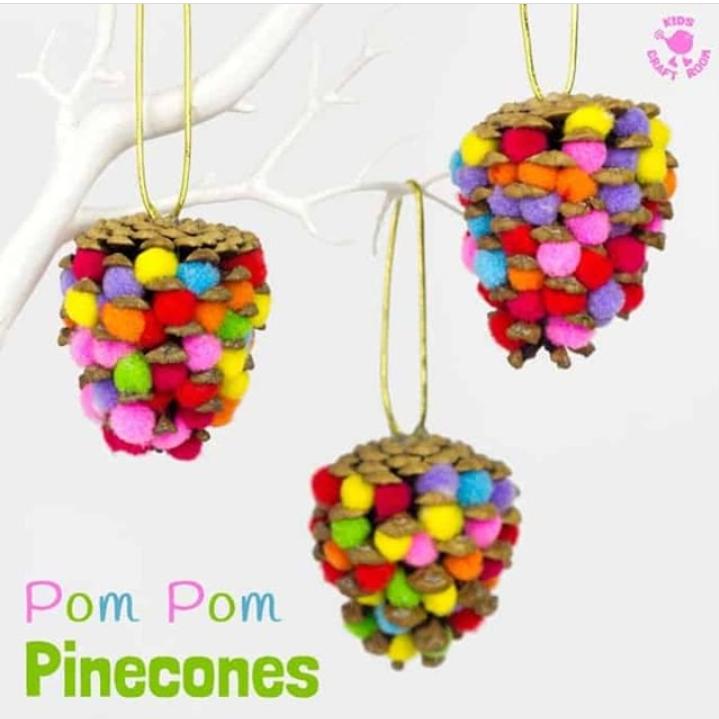
17. DIY Pom Pom Pinecones
This colourful Pom Pom Pinecones craft By kidscraftroom for kids looks great! You can use this nature craft to make Christmas ornaments or as pretty mobiles all year. Making this is super simple too, and you need only a few supplies. You will require a few pine cones, some colorful pom poms, a glue gun, and twine to hang them up. Simply pick up the pom poms and start gluing them in between the gaps of the pine cone using a glue gun. Use the glue gun to attach the twine on top of the pine cone. And that’s it! Wasn’t it easy and fun?
18. Pinecone Christmas Trees
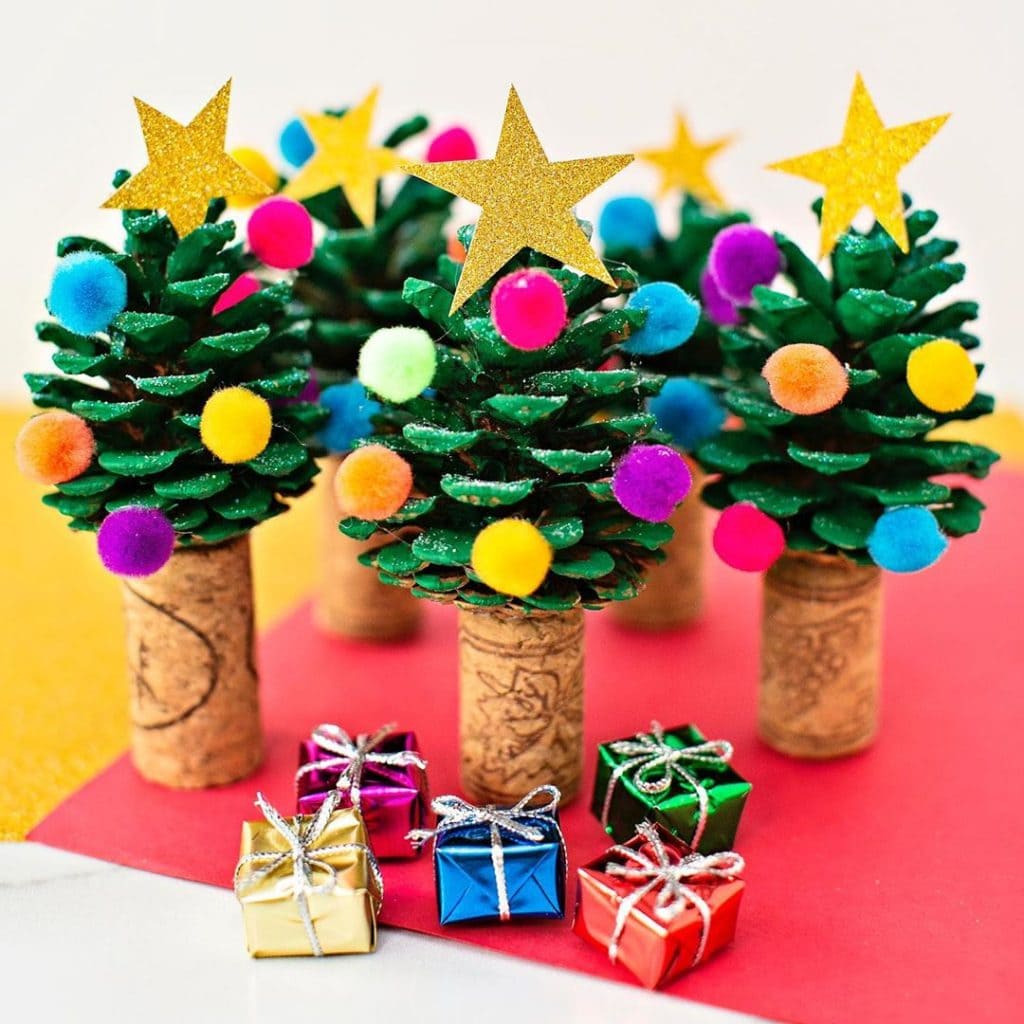
Pinecones are a great and simple decoration that really showcase the fact that winter has arrived. Here are cute mini bottle corks and pinecone Christmas trees by hellowonderful_co. To make these, you will need some pinecones, wine corks, pom poms, a hot glue gun and some paint. The first step is to hot glue the pine cones to the wine cork. Then, paint the pine cone green. You can also sprinkle some glitter on top at this point. Then, hot glue tiny pom poms in the gaps between the pine cone. Cut out a glitter star and attach it to the top of the tree.
19. Button Christmas Cards
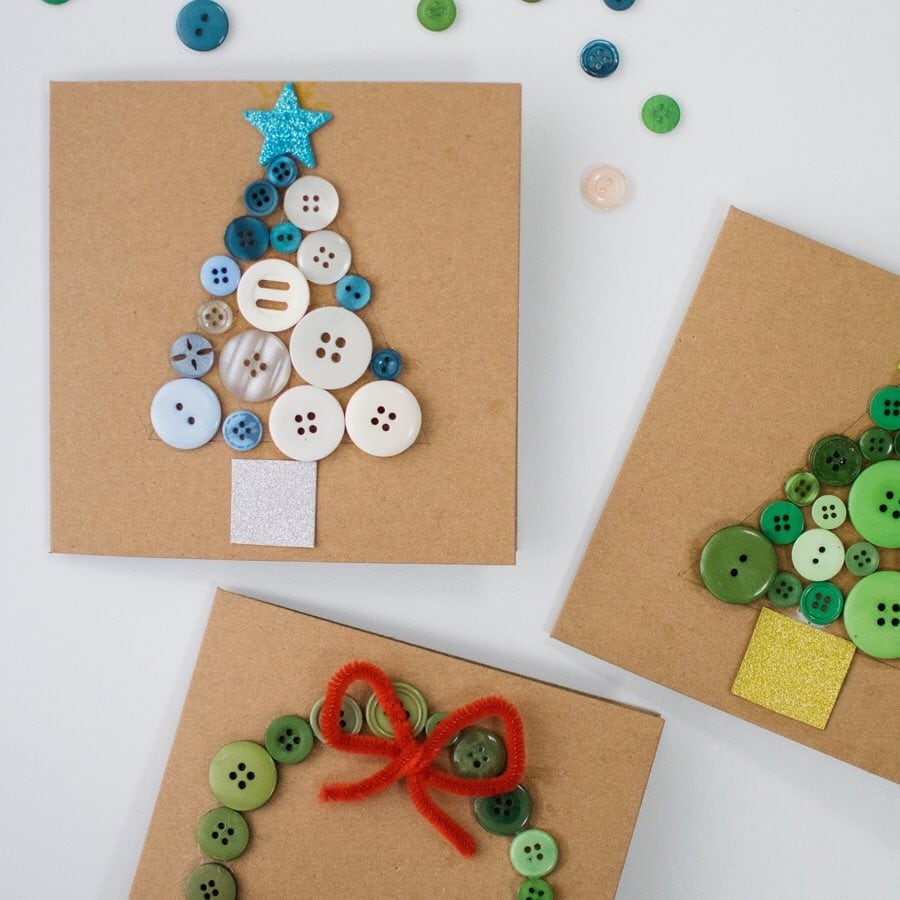
Making and sending out Christmas cards is one of the most fun parts of the Christmas season. Get a little crafty with these cute buttons Christmas cards by inspiremyplay. To make these, all you need are some cute buttons of any size or color that you get. You can paste them in any formation on your card to add a personal touch. You can arrange them in a triangle to form a Christmas card, or in a circle to form a wreath, or in any other design that you want. Get creative.
20. Crafty Reindeer For Kids
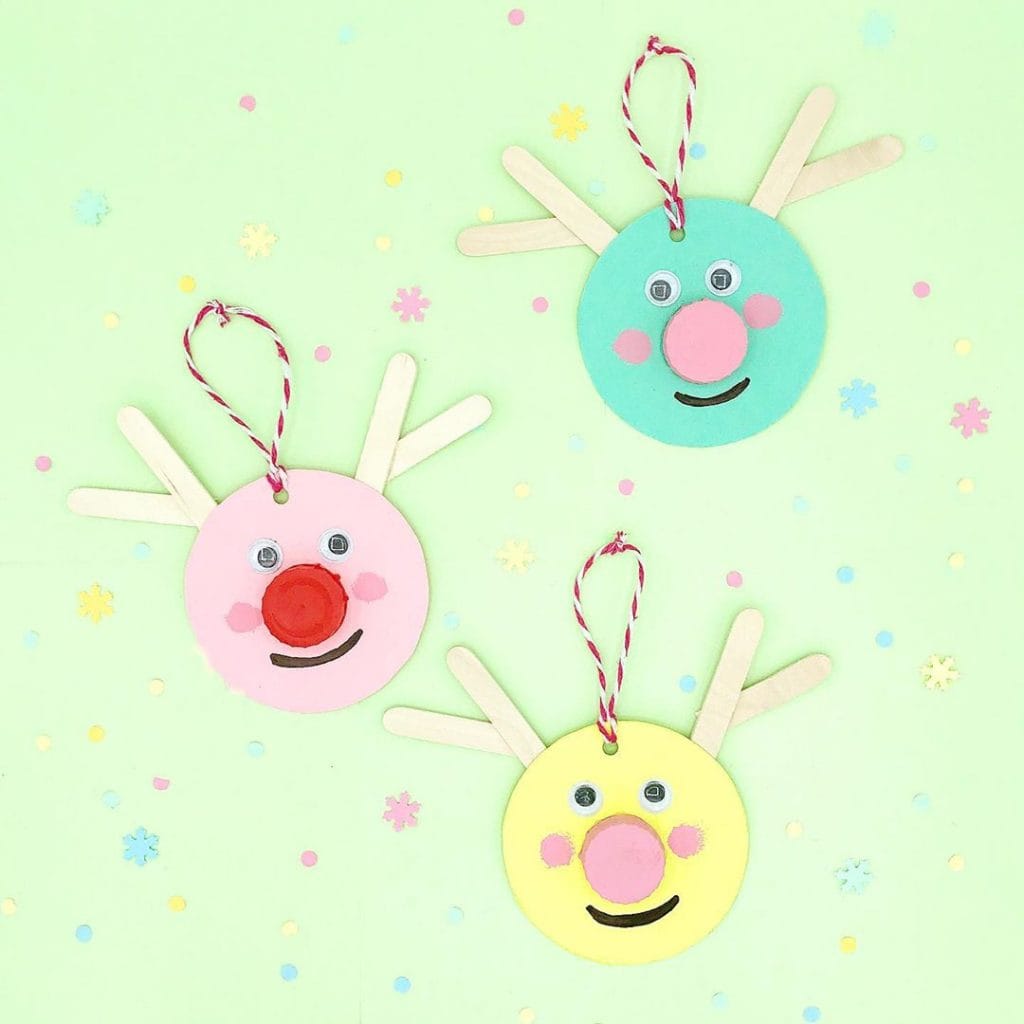
Here are Rudolph pendants by montagskonfetti. You won’t believe how easy these are to create and can be a fun little project for you and your kids. To make these, you’ll be needing some circular cardboard pieces, bottle caps, popsicle sticks, twine, paint, markers, and some googly eyes. First, take the circular cardboard piece, paint it, and punch a hole at the top. Use twine to create a fastening. Paste the bottle caps, googly eyes and popsicle sticks to form the nose, eyes, and antlers of the reindeer. Finally, use a marker to draw a wide smile.
21. Upcycled Snowman Crafts
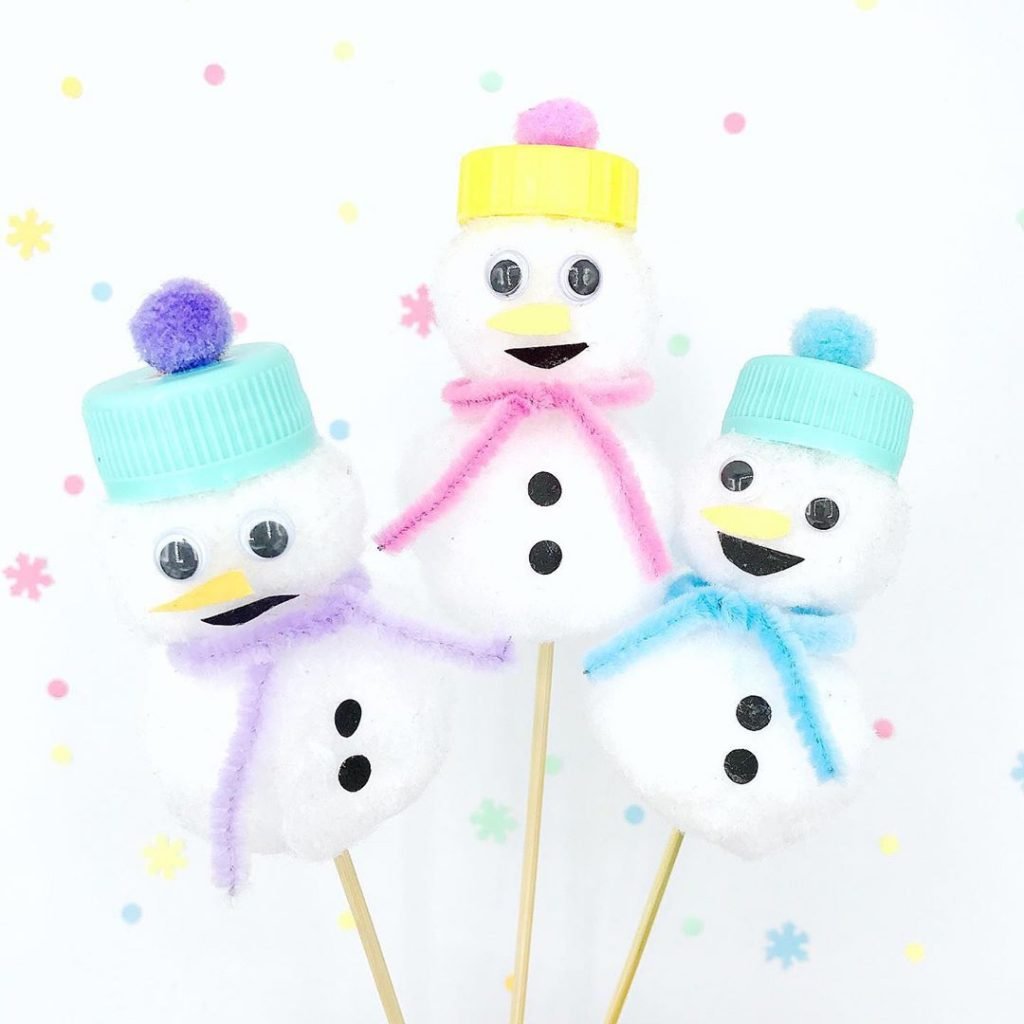
These adorable snowmen by montagskonfetti are made using upcycled materials. All you need to make these are some pom poms, pipe cleaners, bottle lids, googly eyes, wooden skewers and black construction paper. Take two large white pom poms and attach them one on top of the other using a wooden skewer. Then attach a bottle cap on top to make it look like a hat with a smaller pom pom to add some color. Then, use colorful pipe cleaners as a scarf wrapped around the snowman. Add googly eyes and use the craft paper to make cute buttons and a smile.
22. Glittery Popsicle Stick Christmas Trees
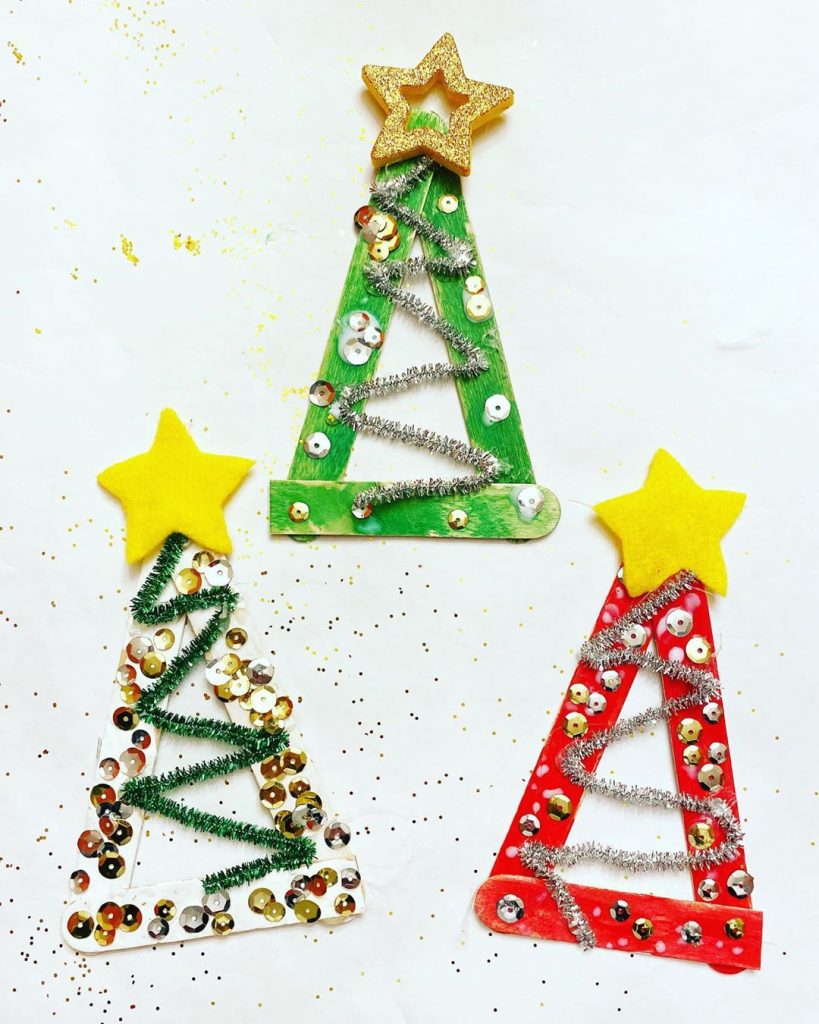
Here is a very simple Christmas DIY for kids by momlifebynicole. It’s very simple to make. All you need are some popsicle sticks, glue, felt, or paper for stars, pipe cleaners, and paint. You can see your kids’ creativity really shine through by simply providing them with the materials and allowing them to go crazy. They can decorate their trees however they want. Use glitter, sequence, or any tiny knick-knack that you have around the house. You can make them into an ornament magnet or cute gift toppers.
23. Colorful Christmas Tree Crafts
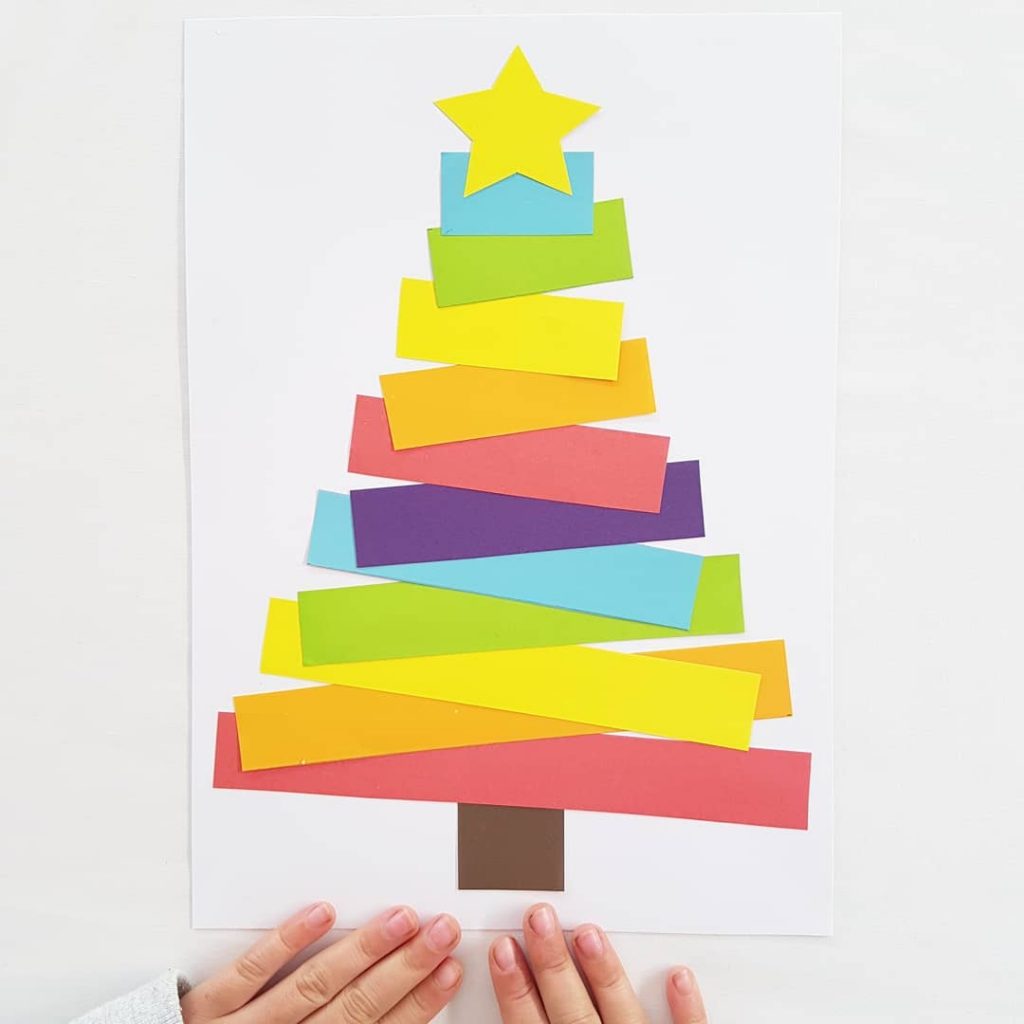
Here is a fun and crafty Christmas tree DIY by cintaandco. You can make these with minimal materials and is a lot of fun too. All you need is a sheet of plain paper, a few sheets of colorful craft papers, a pair of scissors, and a glue stick. Cut the craft paper into rectangles of different sizes and stack them one on top of the other until they start to look like a Christmas tree. Then, glue them onto the sheet of paper and add a star on top. You can encourage your kids to write sweet messages inside and exchange cards with their friends.
24. Washi Tape Christmas Trees
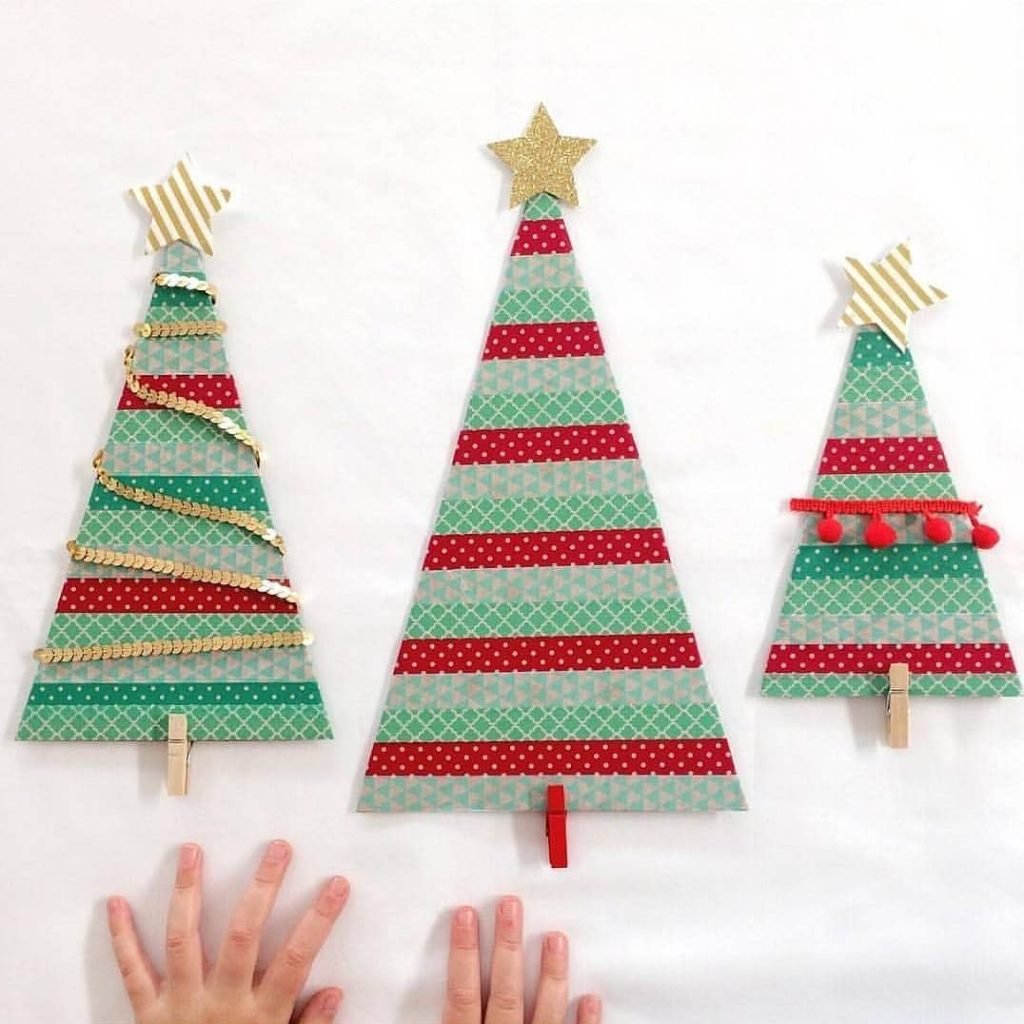
Are you a fan of washi tape ideas too? Then I’m sure you’ll have a lot of fun creating these washi tape Christmas trees by cintaandco. To recreate these, all you need is a few rolls of washi tape, a piece of cardboard, wooden pegs, and anything else you want to use to decorate the trees. Take a cardboard and cut it into a triangle. Then wrap it with washi tape to make it look festive. Use wooden pegs for the trunk and attach a shiny star on top. Then have fun decorating your mini tree using sequence, pom poms, and stars.
25. DIY Christmas Paper Lights
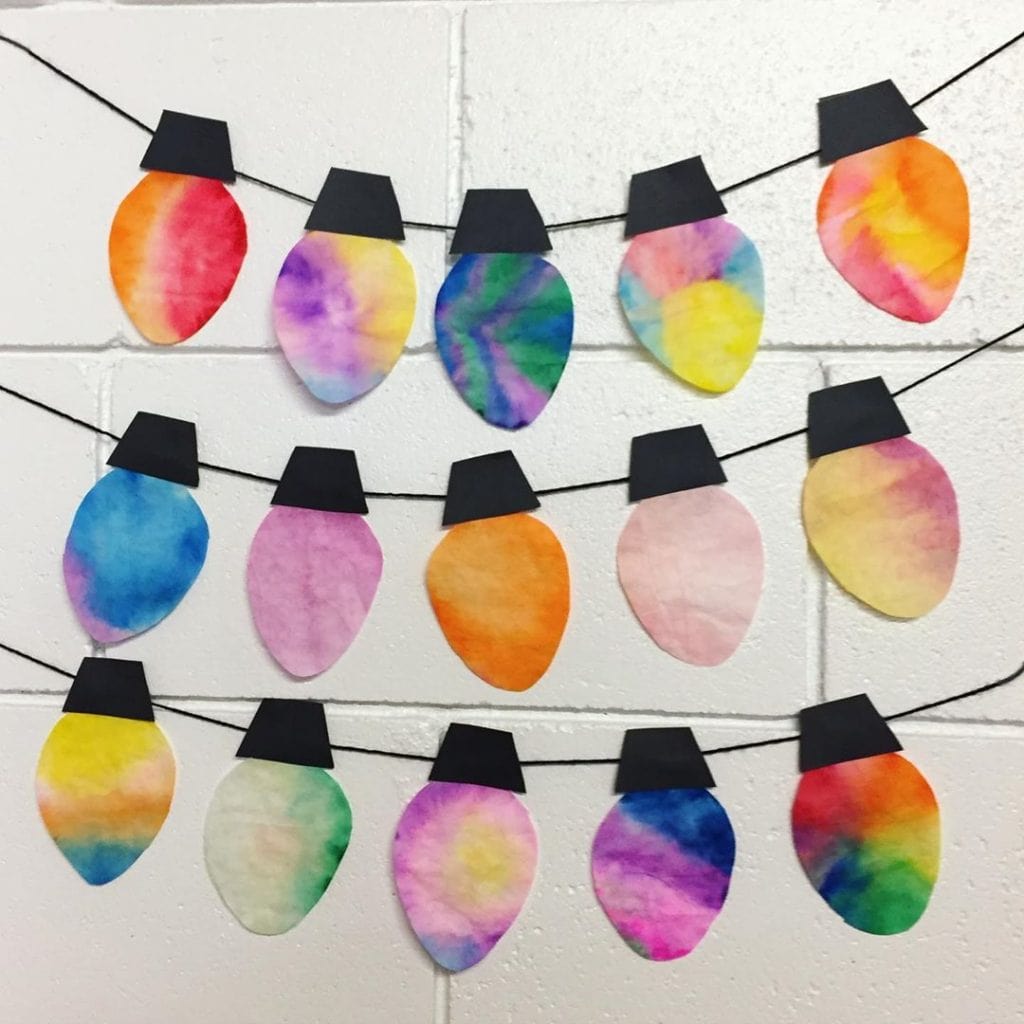
I absolutely love these Christmas lights by alisonsmagicalcrafts. Making them is quite a fun process and you can hang them on the walls or by the window. To make these, you will need some diffusing paper and washable markers. Color the diffusing paper with washable markers, then put a piece of plain paper under it before brushing it with water. Watching the colors bleed is always magical! Set them aside to dry. Then, cut them into these lovely Christmas lights and attach them using twine. Voila!
26. Cardboard House Advent Calendar
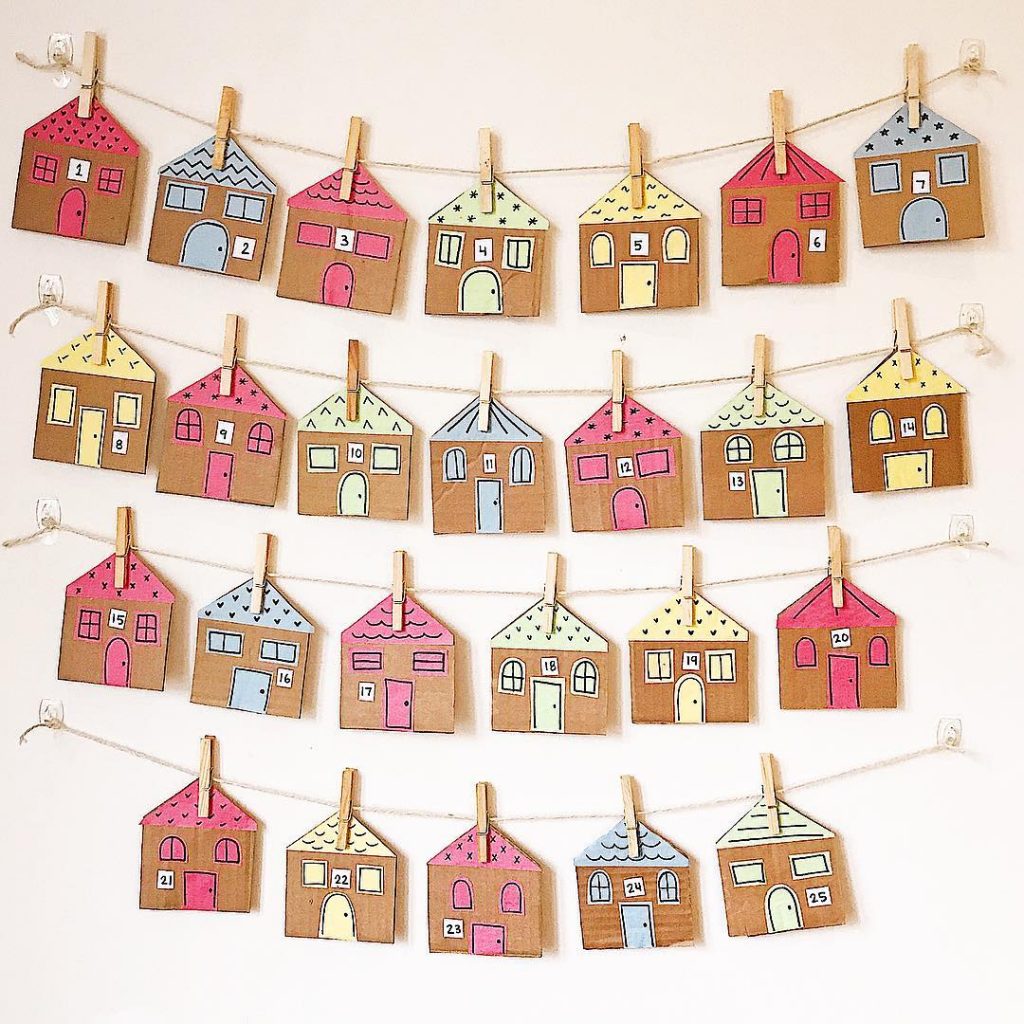
These cardboard houses by learncraftgrow are a fun and colourful way to count down to Christmas. To make this advent calendar, you will need cardboard , colored construction paper, white paper, scissors, glue stick, and a black marker. Cut a house shape out of cardboard. Use the first house as a stencil to trace the rest of the houses. Draw roofs, windows and doors on the colored construction paper using a black marker. Cut them all out and glue them onto the houses. Write numbers 1-25 on white paper, cut them out, and glue each number onto a house.
You can also include a note behind each house that prompts an act of kindness kids can do each day.
That was our compilation of top 26 Christmas crafts for kids to ensure that they not only have fun but also spend some quality time together. Do let us know in the comments section below which one you liked the best and are excited to try out with your kids. Also, check out our other Christmas crafts and DIYs. Happy crafting 🙂
